

LAB 2-SETUP AND USE BLYNK(IOT) WITH ARDUINO(ESP32)


Hardware required
1.Esp 32
2.Ldr
3.Lm 35
4.10k resistor
5.Breadboard
6.Led
7.Micro USB Cable
Software required
1.Arduino Ide
What is Blynk ?
Blynk was designed for the Internet of Things. It can control hardware remotely, it can display sensor data, it can store data, vizualize it and do many other cool things. There are three major components in the platform: … Blynk Server – responsible for all the communications between the smartphone and hardware.
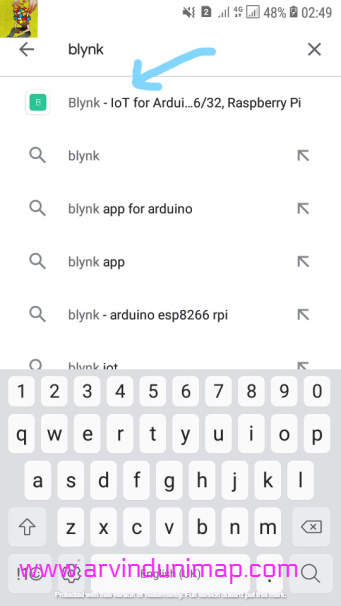
How to Download Blynk ?
1.Open Google Play Store/App Store in your phone.
2.Search “Blynk” and install the app.
Part 1-Getting Time from Internet
Before getting into Blynk,we try connection our esp32 board to the internet to get the time from internet.
1.Open Arduino Ide and upload the code below.
///www.arvindunimap.com

#include <WiFi.h>
#include "time.h"

const char* ssid     = "www.arvindunimap.com";
const char* password = "Knowledge Is Power";

const char* ntpServer = "pool.ntp.org";
const long  gmtOffset_sec = 0;
const int   daylightOffset_sec = 28800; //8*60*60=28800

void setup(){
  Serial.begin(115200);

  // Connect to Wi-Fi
  Serial.print("Connecting to ");
  Serial.println(ssid);
  WiFi.begin(ssid, password);
  while (WiFi.status() != WL_CONNECTED) {
    delay(500);
    Serial.print(".");
  }
  Serial.println("");
  Serial.println("WiFi connected.");

  // Init and get the time
  configTime(gmtOffset_sec, daylightOffset_sec, ntpServer);
  printLocalTime();

  //disconnect WiFi as it's no longer needed
  WiFi.disconnect(true);
  WiFi.mode(WIFI_OFF);
}

void loop(){
  delay(1000);
  printLocalTime();
}

void printLocalTime(){
  struct tm timeinfo;
  if(!getLocalTime(&timeinfo)){
    Serial.println("Failed to obtain time");
    return;
  }
  Serial.println(&timeinfo, "%A, %B %d %Y %H:%M:%S");
  Serial.print("Day of week: ");
  Serial.println(&timeinfo, "%A");
  Serial.print("Month: ");
  Serial.println(&timeinfo, "%B");
  Serial.print("Day of Month: ");
  Serial.println(&timeinfo, "%d");
  Serial.print("Year: ");
  Serial.println(&timeinfo, "%Y");
  Serial.print("Hour: ");
  Serial.println(&timeinfo, "%H");
  Serial.print("Hour (12 hour format): ");
  Serial.println(&timeinfo, "%I");
  Serial.print("Minute: ");
  Serial.println(&timeinfo, "%M");
  Serial.print("Second: ");
  Serial.println(&timeinfo, "%S");

  Serial.println("Time variables");
  char timeHour[3];
  strftime(timeHour,3, "%H", &timeinfo);
  Serial.println(timeHour);
  char timeWeekDay[10];
  strftime(timeWeekDay,10, "%A", &timeinfo);
  Serial.println(timeWeekDay);
  Serial.println();
}
2.The ssid is your wifi name
3.The password is your wifi password
4.Dont compile now.If you did it will show the wrong time because the daylightOffset_sec is set to 3600 which is wrong because Malaysia is using different utc code.

The UTC for Malaysia is +8,so daylightOffset_sec is 8*60*60=28800
5.After you upload the code the esp32 will connect to the internet to get the time and it will disconnect automatically after it gets the time
6.The output is shown below:

How Blynk Works?

Blynk is a new platform that allows you to quickly build interfaces for controlling and monitoring your hardware projects from your iOS and Android device. After downloading the Blynk app, you can create a project dashboard and arrange buttons, sliders, graphs, and other widgets onto the screen.
Part 2-Download and Setup Library for Blynk
1.Install Blynk in your phone following the steps mentioned above.
2.Open Arduino Ide>Sketch>Include Library>Manage Library and search for Blynk.Click install.In my case,I have already installed it.

OR
3.The above method is one of the method to intall library for the Blynk.The other method is by downloading blynk library in zip format and add library manually.
4.You can download the LIBRARY in this link:
https://github.com/blynkkk/blynk-library/releases/tag/v0.6.1
5.After that click Sketch>Include Library>Add .Zip Library and search for Blynk zip file and add it by clicking open

Part 3-Getting Start Blynk App (Digital Pin)
1.Open Blynk App in your phone.Log in with Gmail/Facebook or you can create a new account.
2.Click New Project.
3.Create a project name , select board>esp 32 ,connection type >wifi

4.Click create.The Auth token will be sent to your email account.

5.Click the plus symbol to add gpio pins.

6.Click the Button widget.


7.Click the button widget.


8.Click pin and select gp2 and then click ok.


9.And then change from push to switch.

10.After you are done ,click the back icon.

11.Now click the play button to start the blynk app.


12.Now open Arduino Ide and connect the circuit as below, upload the led blynk code.
Blue – pin 2
Red-ground

///www.arvindunimap.com

#define BLYNK_PRINT Serial
#include <WiFi.h>
#include <WiFiClient.h>
#include <BlynkSimpleEsp32.h>
int pin = 2;
char auth[] = "kCGl7vT6G8tLFpkZL4GVIrMfxFm0rYD8";
char ssid[] = "www.arvindunimap.com";
char pass[] = "Knowledge Is Power";
void setup() {
  pinMode(pin, OUTPUT);
  pinMode(pin, HIGH);
  Serial.begin(9600);
  delay(10);
  Serial.print("Connecting to ");
  Serial.println(ssid);
  WiFi.begin(ssid, pass);
  int wifi_ctr = 0;
  while (WiFi.status() != WL_CONNECTED) {
  delay(500);
  Serial.print(".");
  }
  Serial.println("WiFi connected");
  Blynk.begin("kCGl7vT6G8tLFpkZL4GVIrMfxFm0rYD8", ssid, pass);
}
void loop(){
    Blynk.run();
}
13.Click upload and open the blynk app.You can control your led now.
14.The output will be like below:

Part 4-Displaying LM35 and LDR sensor’s data in Blynk
Task of the day
Connecting the circuit
1.Green-LDR TO VCC
2.BROWN-PIN 34
3.RED-GROUND
4.WHITE-VCC
5.GREEN-LM35 TO PIN 35
6.BLUE-GROUND
7.BLACK-GROUND
8.PURPLE-VCC

Setting up Blynk
1.Add Label Value to configure LDR

2.And then select V1 .Choose Push.
3.Repeat step again for LM 35
4.Select V2 for LM 35 and select Push.
5.You can skip the graph if you want because I did extra.If you want to add it,you can use the Super Chart block in Blynk.
5.Upload the coding
///www.arvindunimap.com

#define BLYNK_PRINT Serial
#include <WiFi.h>
#include <WiFiClient.h>
#include <BlynkSimpleEsp32.h>

char auth[] = "kCGl7vT6G8tLFpkZL4GVIrMfxFm0rYD8"; //Auth token id
char ssid[] = "www.arvindunimap.com";            // Your Wi-Fi Credentials
char pass[] = "Knowledge Is Power";

int val;
// the setup routine runs once when you press reset:
void setup() {
  // initialize serial communication at 9600 bits per second:
  Serial.begin(9600);
  delay(10);
  Serial.print("Connecting to ");
  Serial.println(ssid);
  WiFi.begin(ssid, pass);
  int wifi_ctr = 0;
  while (WiFi.status() != WL_CONNECTED) {
  delay(500);
  Serial.print(".");
  }
  Serial.println("WiFi connected");
  Blynk.begin(auth, ssid, pass);
}

// the loop routine runs over and over again forever:
void loop() {
  Blynk.run();
  // read the input on analog pin 0:
  int ldrval = analogRead(34); //LDR
  val = analogRead(35);//LM35
  float mv = ( val/1024.0)*4940;
  float cel = (mv/10) ;
  float farh = (cel*9)/5 + 32; //just in case

  // print out the value you read:
  Serial.print("LDR:"); Serial.print(ldrval);//LDR
  Serial.print("  LM35:"); Serial.println(cel);//LM35
  Blynk.virtualWrite(V1, ldrval);
  Blynk.virtualWrite(V2, String(cel, 1));
  delay(2000);        // delay in between reads for stability
}
3.The output is shown below:


