

DISCLAIMER:I DO NOT OWN ANY OF THESE SOFTWARE.THE CRACKS AND TUTORIALS ARE USED FOR ONLY EDUCATION PURPOSE ONLY.PLS DO NOT COMMERCIALIZE THE SOFTWARE.
Step 1:Disk Partition
1.Please make sure that you have a minimum 40 gb free space in your hard disk.
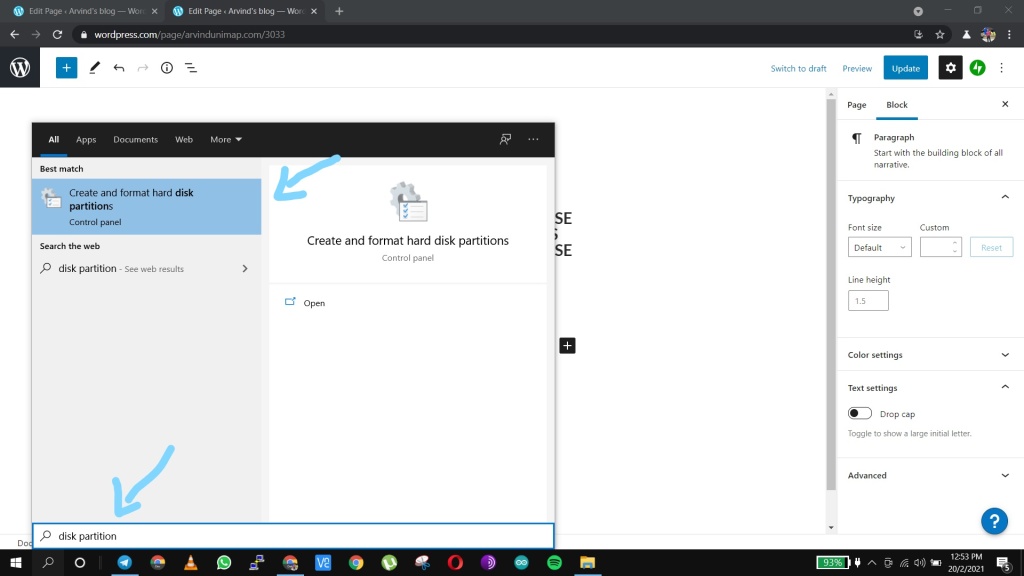
2.Search for disk partition and select the create and format hard disk partition.
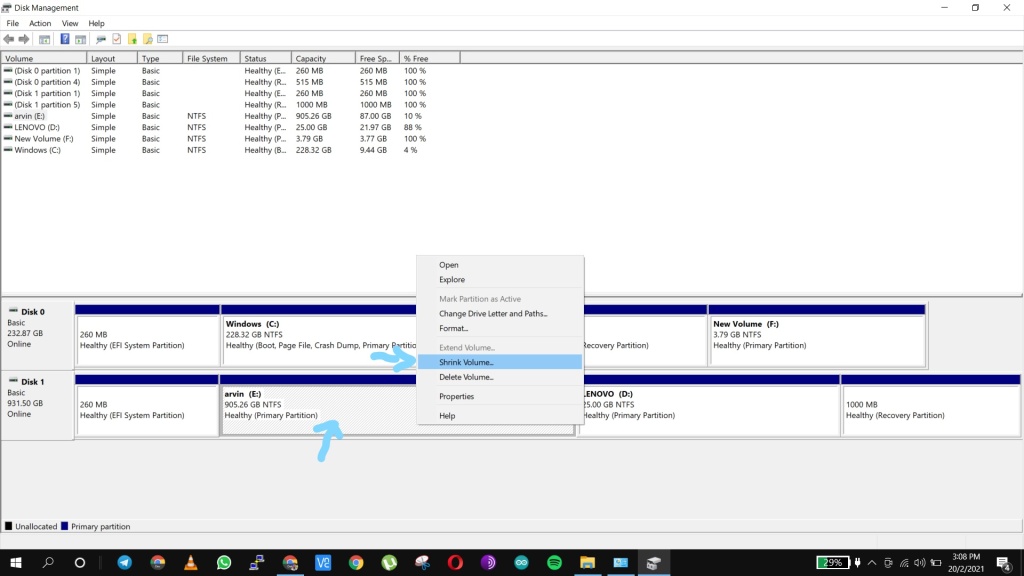
3.Right click on the hard disk you wanna create disk partition.Choose shrink volume.
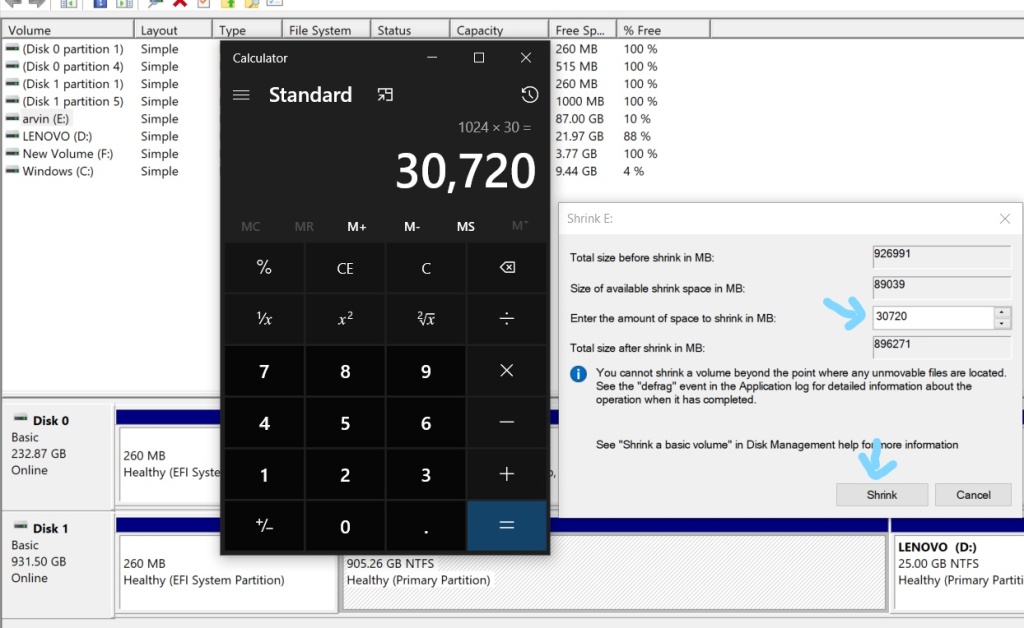
4.Now time to enter the volume you wanna shrink.In my case, I want to shrink 30 GB.
Here is the formula-1024 x (The amount you wanna use)
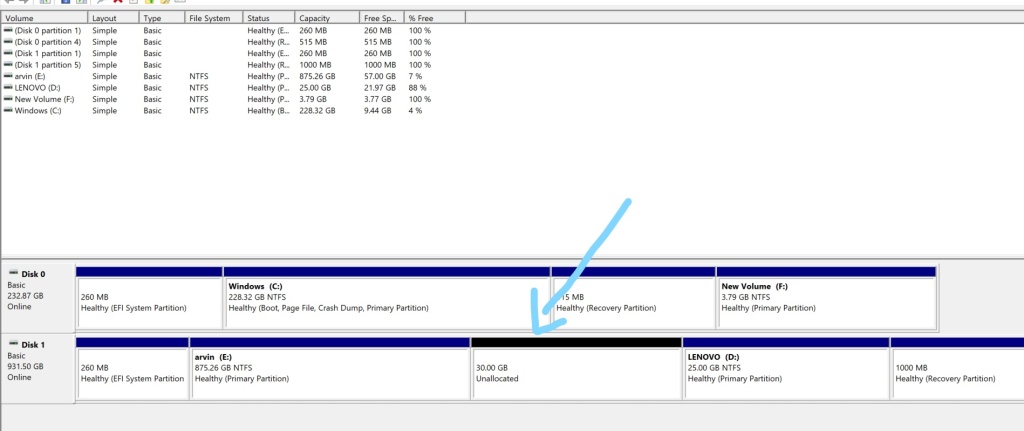
5.Here is the output.Thats all you are done with disk partition.
Step 2: Flashing Your Pendrive
1.Download Rufus Software from my drive link.
2.Download Kali Linux Iso file my drive link.
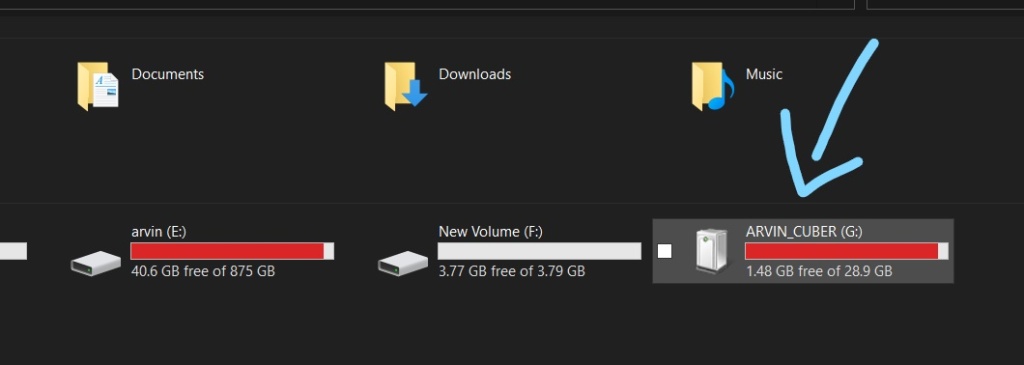
3.Its time to Format your pendrive . This is my pendrive below:
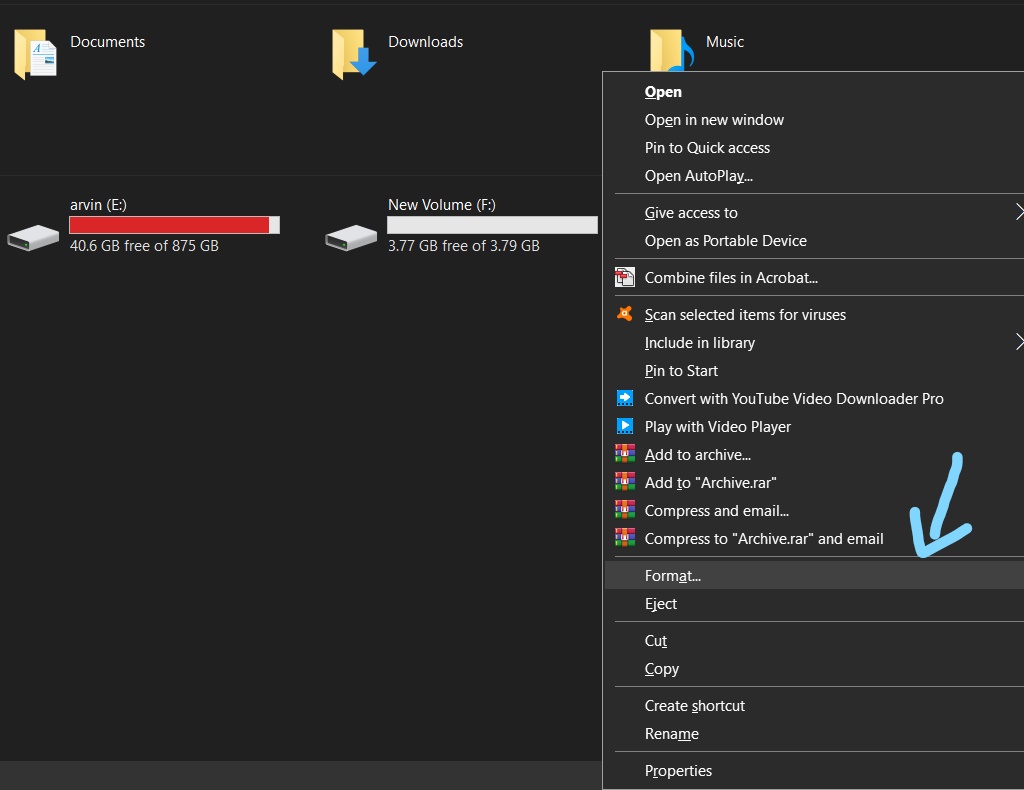
4.Right click and click format.
5.Click start

6.Click ok.
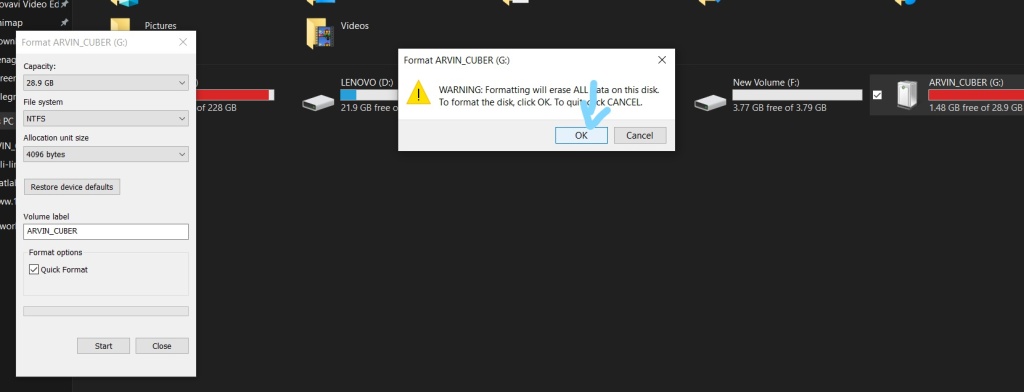
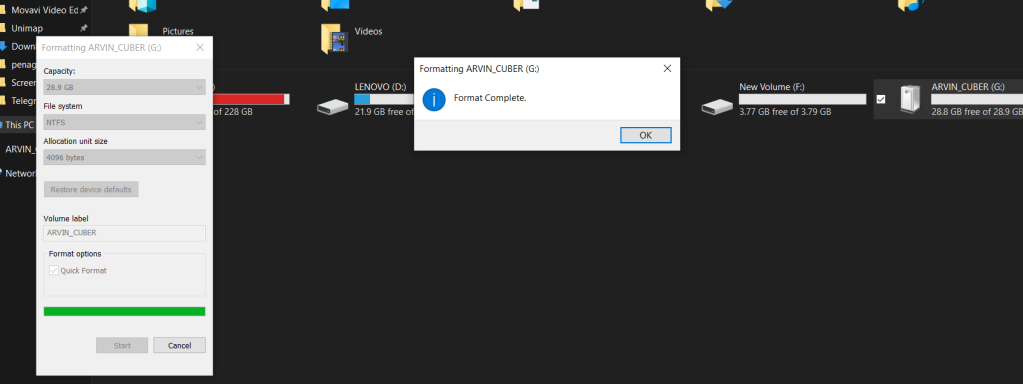
7.Click ok.
.
8.Select the iso file like below.
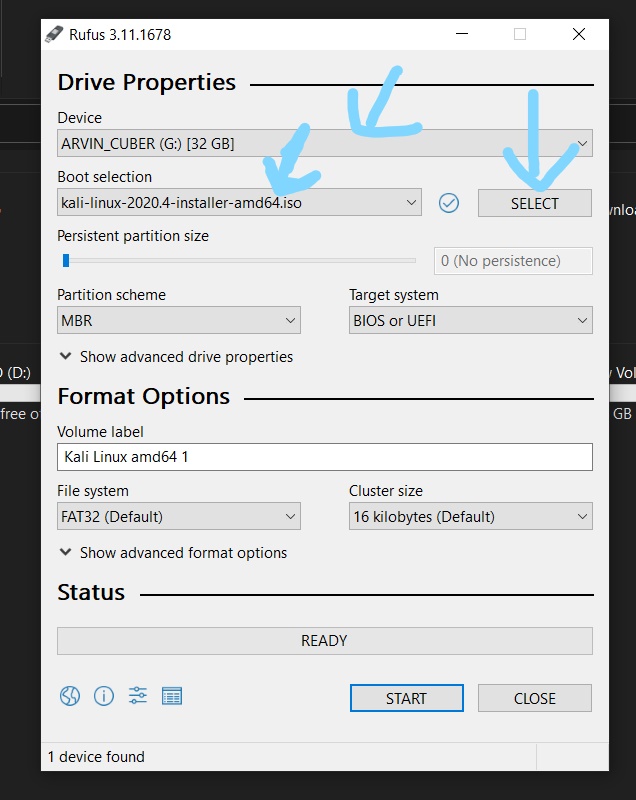
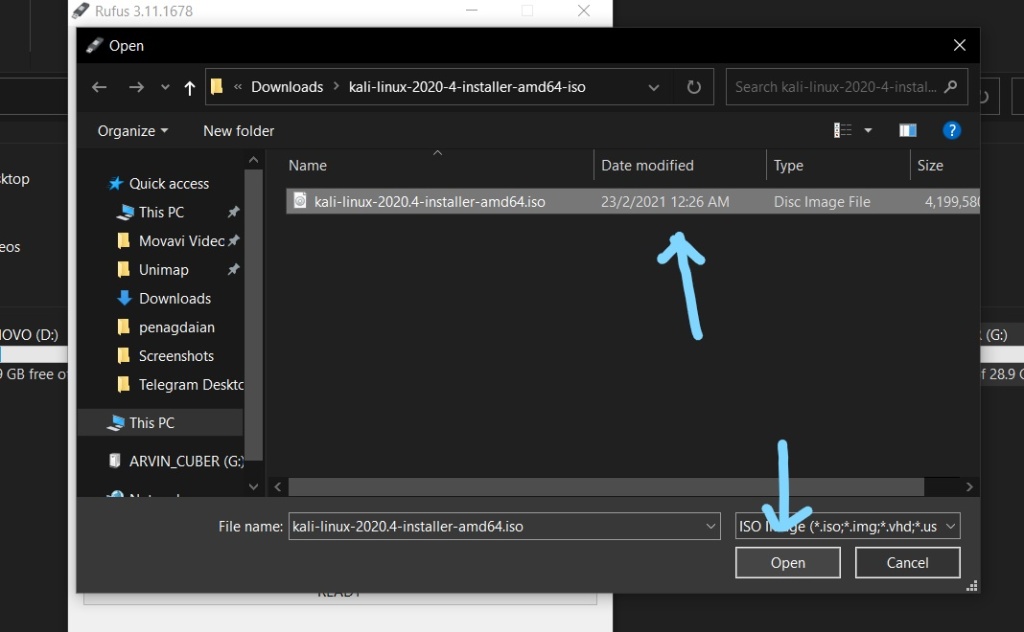
9.Click select and browser for the kali linux iso file.
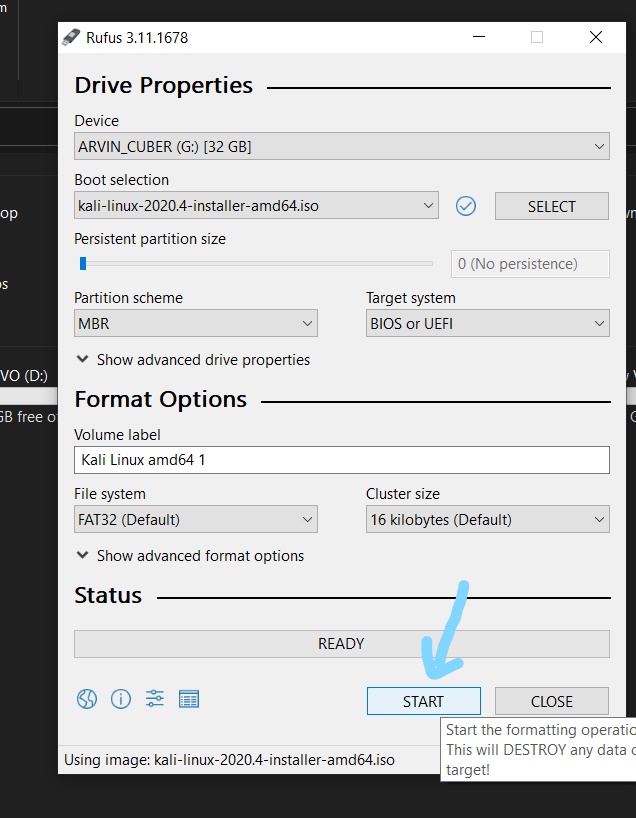
10.Click start to flash.
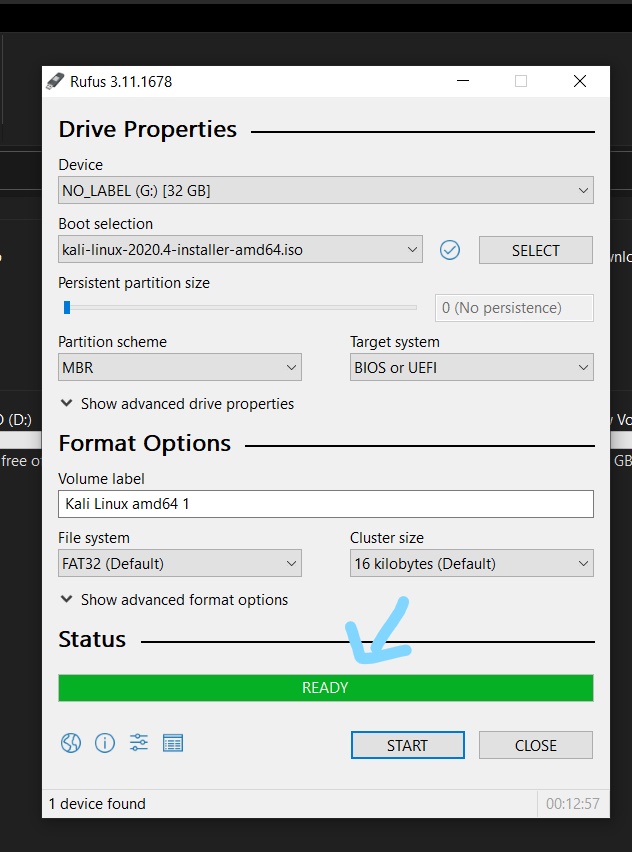
11.When its done you cam see the full green.
12.Thats all you are done now restart and go to your boot menu when restarting.
13.Different laptop brands have different boot menu key.Mine is Fn+F12.
Step 3: Booting from Pendrive and Installing Kali Linux
1.Since I cannot screenshot the boot screen, you can refer to this video from 7.13 to 14.28.
2.Note : If you are using 50 gb.
Root -25 gb
Home- 20 gb
Swap-8.7 gb
if you are using 30 gb
Root-15 gb
Home-12 gb
Swap-13 gb above
Just use all the remaining free space for swap partition after you use for root and home partition.

You must be logged in to post a comment.